Introduction to Python
PythonExtra is a custom Python runtime made for ClassPad calculators, built on top of the gint kernel.
It lets you build games, utilities, and animations using pure Python, while accessing low-level screen rendering, key input, file reading, and much more.
If you’re just getting started, no setup is needed.
Just open your Codespace or use your favorite editor and you’re ready to write Python code that runs directly on your calculator!
Create your own programs
Section titled “Create your own programs”There are 3 ways to get started with PythonExtra. Whether you want to code in your browser, on your computer, or directly on your calculator, we’ve got you covered.
Instant Start: GitHub Codespaces (Recommended)
Section titled “Instant Start: GitHub Codespaces (Recommended)”This is the fastest and easiest way for beginners. You don’t need to install anything on your computer because everything runs in your web browser.
- Step 1: Click the link below to open the template. You’d be prompted to create a Github account, proceed.
-
Step 2: Wait for the editor to load, then create a new
my_game.pyfile or just edit thebounce.pyexample. -
Step 3: Download your file (eg,
my_game.py, orbounce.py) to your computer or tablet (or phone) and then plug your calculator onto your computer and copy your python file. You may need to also download and copy the PythonExtra.hh3 file to your calculator if you haven’t installed it already. Safely remove your calculator, and on the calculator, go to the System menu, open the top-left menu, and run Hollyhock Launcher. Open PythonExtra: Find PythonExtra in the list and click Run. On this list, find yourmy_game.py(orbounce.py) and run it.
Professional Setup: Local Computer
Section titled “Professional Setup: Local Computer”Use this option if you want to work on your computer using VS Code. You can use this as a baseline for any other editor you use, like Cursor or Antigravity.
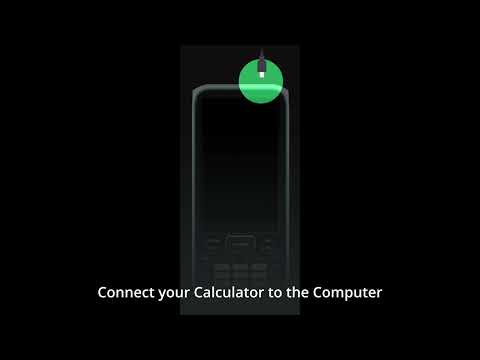
Click the image below for a full video guide :
-
Install the Basics: Download and install VS Code and Python.
-
Get the Template: Download the Project Template ZIP and extract it on your computer.
-
Open in VS Code: Open the folder
pythonextra-template-masterin VS Code. -
Extensions: Install the Python Extension if prompted.
-
Install Libraries: Open the VS Code terminal and type:
pip install pygame -
Test it: Run the file named
bounce.pyto make sure everything works (You can use “Run” > “Start Debugging” on the menu).
Pro Tip: Create a GitHub account and publish your code there so you never lose your progress!
- Run it: Plug your calculator onto your computer and copy your python file. You may need to also download and copy the PythonExtra.hh3 file to your calculator if you haven’t installed it already.
- Safely remove your calculator
- On the calculator, go to the System menu, open the top-left menu, and run Hollyhock Launcher.
- Open PythonExtra: Find PythonExtra in the list and click Run.
- On this list, find your
my_game.py(orbounce.py) and run it.
School Mode: Directly on your Calculator
Section titled “School Mode: Directly on your Calculator”This is the slowest method, but it’s perfect if you don’t have a computer nearby and only have your calculator. (Eg you need to code during school lessons)
Initial Setup (Requires a computer once)
Section titled “Initial Setup (Requires a computer once)”Download these three files:
Transfer Files: Connect your calculator to a computer via USB. Select Transfer Files on the calculator popup. Copy the three files above to the root of your calculator’s storage (do NOT put them in AutoImport). Safely unplug the calculator.
Usage (when you don’t have computer)
Section titled “Usage (when you don’t have computer)”Click the image below for a full video guide :
-
Launch: On the calculator, go to the System menu, open the top-left menu, and run Hollyhock Launcher.
-
Open PythonExtra: Find PythonExtra in the list and click Run.
-
Start Coding:
-
Pick
ced_new.pyfrom the list and press EXE. -
Press the Keyboard button to start typing your code.
-
-
Save & Run:
-
Open the hamburger menu and choose Save As… to name your file (e.g.,
my_game1.py). -
Quit the editor, exit PythonExtra, then re-launch PythonExtra to select and run your new file!
-
Need Help While Coding?
Section titled “Need Help While Coding?”Stuck on something? Don’t worry, you don’t have to figure it all out alone.
You can ask help directly to the
👉 👨💻 PythonExtra ChatGPT
If you’re old school, you can also ask
💬 on the ClassPad Club
Beginner Tutorials
Section titled “Beginner Tutorials”These tutorials will walk you through the essentials of PythonExtra, from printing your first message to creating animated programs.
Step 1: Drawing Your First Rectangle
Section titled “Step 1: Drawing Your First Rectangle”Learn how to:
- Draw a custom logo made of text
- Move it across the screen
- Bounce it off screen borders
- Exit the program on key press
Step 2: Drawing and Colors
Section titled “Step 2: Drawing and Colors”Learn to draw colored shapes, fill the screen, and use screen coordinates with precision. Perfect for starting any visual project.
Step 3: Handling Input
Section titled “Step 3: Handling Input”In this tutorial, you’ll make a simple game where you move a shape around with the keyboard. It covers real-time input with pollevent() and keydown().
Step 4: Bouncing Logo
Section titled “Step 4: Bouncing Logo”Learn how to:
- Draw a custom logo made of text
- Move it across the screen
- Bounce it off screen borders
- Exit the program on key press
Step 5: Snake ? Snaaake !
Section titled “Step 5: Snake ? Snaaake !”Put everything you learnt in practice with the classical “Snake” game
Step 6: The Dino Game
Section titled “Step 6: The Dino Game”Let’s create another classic game, the “Dino” game jumping on cactus
Step 7: Drawing Images
Section titled “Step 7: Drawing Images”Use tools like fxconv to convert real images into Python data and draw them on screen.
What’s next?
Section titled “What’s next?”If you’re comfortable with drawing, input, and animation, try combining them into your own game or app. PythonExtra is capable of running surprisingly complex things and you can always peek at sample projects like:
Technical Documentation
Section titled “Technical Documentation”Want to dive into the internals and low-level functions?
Check out the full technical documentation
(also available in french for some reason 🇫🇷)
There’s also casioplot module. Not really great for games, but might be useful in other contexts!
Try Drawing Code Online
Section titled “Try Drawing Code Online”Want to quickly test simple drawing code (like gint.drect, gint.dpixel, gint.dcircle, etc.)?
You can use the PythonExtra REPL (beta) here:
🌐 python-extra-repl
⚠️ This REPL only supports drawing commands.
Functions like gint.getkey() or gint.pollevent() won’t work.
Avoid infinite loops like while True:. You’ve been warned.
All the Examples
Section titled “All the Examples”Want more sample code?
All examples can be found here:
🔗 https://git.planet-casio.com/Lephenixnoir/PythonExtra/src/branch/main/ports/sh/examples
⚠️ Note: some of these aren’t tailored specifically for the ClassPad, so you might need to tweak them.