Hello World
This tutorial will guide you through creating a simple “Hello World” app for your Classpad calculator using C. Even if you’re new to C development, we’ll take it step by step.
Step 1: Empty base
Section titled “Step 1: Empty base”Start with the “Application Template”.
Go to your codespace and open the “main.c” file. Delete all of its content (Ctrl+A → Delete) and start by adding only the needed imports:
#include <appdef.h>#include <sdk/calc/calc.h>#include <sdk/os/lcd.h>#include <sdk/os/debug.h>Here, we include essential files that provide functionalities for creating apps on the Classpad calculator. Let’s break down what each import does:
<appdef.h>: This file helps define essential properties of your app, such as its name, description, author, and version. This information will appear on the launcher menu.<sdk/calc/calc.h>: This file includes general-purpose functions and settings related to the calculator environment.<sdk/os/lcd.h>: The LCD (Liquid Crystal Display) file is crucial for interacting with the calculator’s screen. It provides functions for refreshing the display and filling it with color.<sdk/os/debug.h>: The debug file offers simple functions for printing text and waiting for key presses, making it perfect for getting started.
Now, let’s move on to the next step and start building your “Hello World” app!
Step 2: Set Up Your App Information
Section titled “Step 2: Set Up Your App Information”Start by filling in some basic information about your app. Add these lines after your includes:
APP_NAME("Hello World")APP_DESCRIPTION("App that says hello")APP_AUTHOR("You")APP_VERSION("1.0.0")You can customize your app’s name, description, author, and version. This information is optional but is very helpful for identifying your app on the launcher menu.
Step 3: Writing the Main C Function
Section titled “Step 3: Writing the Main C Function”Now, let’s dive into the heart of your app—the main() function. In C, every program starts executing from a function called main(). Think of it as the command center for your code.
int main() {  /* Your code goes here... */
  return 0;}
Here’s a simple breakdown:
int main() { /* ... */ }: This is the entry point of your program. Theintmeans that themain()function will return an integer value when it’s done.return 0;: By convention, returning0tells the calculator that your app finished successfully.
Inside the curly braces { /* ... */ }, you’ll put the instructions that make up your app. It’s like a recipe; the calculator follows these steps in order when you run your program.
Step 4: Coloring the Screen
Section titled “Step 4: Coloring the Screen”Let’s start by giving your app a background color. Add this line inside your main function:
fillScreen(color(0,0,0)); // Fill the screen with black (Red, Green, Blue)The fillScreen() function fills the entire screen with a single color. It uses the color() helper, which takes Red, Green, and Blue (RGB) values from 0 to 255. In this case, color(0,0,0) creates the color black. You can experiment with other values like color(255,0,0) for red or color(255,255,255) for white.
Step 5: Writing Text to the Screen Buffer
Section titled “Step 5: Writing Text to the Screen Buffer”Next, let’s write “Hello World!” to the screen. This is a two-step process: first, we set the cursor position, and then we print the string.
Debug_SetCursorPosition(6,2); // Set the position to x=6, y=2 (72px, 48px)Debug_PrintString("Hello World !",0);-
Debug_SetCursorPosition(6,2): This sets the position cursor where your text will be drawn. The coordinates (6, 2) translate to (x=72px, y=12px) on the actual screen as the font size is 6x12. -
Debug_PrintString("Hello World !",0): This draws the text “Hello World !” on the screen buffer, but won’t display it right now.
Here, your message will appear at (72px, 12px) on the screen after the next step. Feel free to adjust the coordinates to place your text where you want.
Step 6: Updating the Screen with LCD_Refresh()
Section titled “Step 6: Updating the Screen with LCD_Refresh()”To make our text appear, we need to pull back the curtain! The LCD_Refresh() function copies the contents of the hidden screen buffer to the actual LCD display, making all your changes visible at once.
LCD_Refresh(); // Update the screen to show the changesThis is a key step. Without it, your screen would remain black because the “Hello World” text would still be hidden in the buffer.
Step 7: Waiting for User Input
Section titled “Step 7: Waiting for User Input”If the app were to end here, it would flash your message on the screen and exit immediately. To prevent this, we need to pause the program and wait for the user to press a key.
Debug_WaitKey(); // Wait for any key to be pressedThis simple function does exactly what its name suggests: it halts the program until any key on the calculator is pressed. Once a key is pressed, the program continues to the next line.
Step 8: Build and Install the App
Section titled “Step 8: Build and Install the App”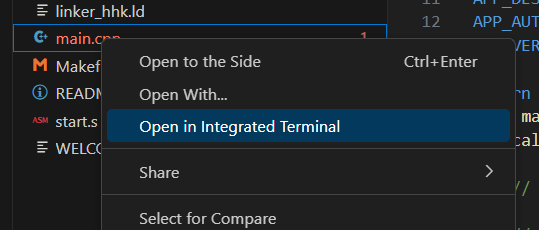
Inside the terminal, enter the following command and press Enter: make -j
On the file tree, you should see a newly created file named “app_template.bin”. Right-click it and download it to your computer.
Now, plug your calculator into your computer and copy this file to the root folder of the calculator (the very first folder that opens, not “Autoimport”).
Finally, unplug your calculator and go to Menu → System → Hollyhock Launcher. Find your “Hello World” app and launch it.
You should see something like this:
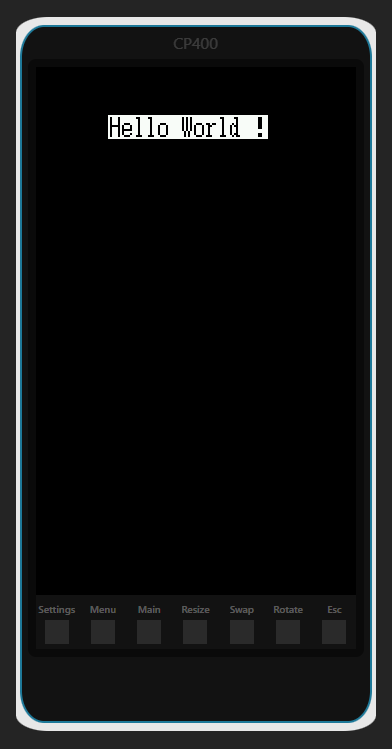
Congratulations! You’ve successfully created your first C application for the Classpad. You can now experiment by changing the colors and the text message!
Final Code
Section titled “Final Code”#include <appdef.h>#include <sdk/calc/calc.h>#include <sdk/os/lcd.h>#include <sdk/os/debug.h>
/* * Fill this section in with some information about your app. * All fields are optional - so if you don't need one, take it out. */APP_NAME("Hello World")APP_DESCRIPTION("App that says hello")APP_AUTHOR("You")APP_VERSION("1.0.0")
int main() { // Fill the screen with a solid color fillScreen(color(0,0,0)); // Red, Green, Blue (0,0,0 is black)
// Set the position for the text (column 6, row 2) Debug_SetCursorPosition(6,2); // Print the text string to the screen buffer Debug_PrintString("Hello World !",0);
// Push the changes from the buffer to the actual screen LCD_Refresh();
// Wait for any key to be pressed before exiting Debug_WaitKey();
// Return 0 to indicate the app ran successfully return 0;}