Hello World
This tutorial will guide you through creating a simple “Hello World” app for your Classpad calculator using C++. Even if you’re new to C development, we’ll take it step by step.
Step 1: Empty base
Section titled “Step 1: Empty base”Start with the “Application Template”.
Go to your codespace and open the “main.cpp” file. Delete all of its content (Ctrl-a → Delete) and start by adding only the needed imports :
#include <appdef.hpp>#include <sdk/calc/calc.hpp>#include <sdk/os/lcd.hpp>#include <sdk/os/debug.hpp>Here, we include essential files that provide functionalities for creating apps on the Classpad calculator. Let’s break down what each import does:
<appdef.hpp>: This file helps define essential properties of your app, such as its name, description, author, and version. Think of it as setting up the basic information for your project, as they will appear on the launcher menu as it.<sdk/calc/calc.hpp>: This file includes functions and settings related to the Classpad calculator itself, like initializing and ending the calculator environment<sdk/os/lcd.hpp>: The LCD (Liquid Crystal Display) file is crucial for interacting with the calculator’s screen. It provides functions for refreshing the display and setting pixel colors.<sdk/os/debug.hpp>: The debug file assists in debugging your code by offering functions for printing messages and setting cursor positions on the calculator screen.
Now, let’s move on to the next step and start building your “Hello World” app!
Step 2: Set Up Your App Information
Section titled “Step 2: Set Up Your App Information”Start by filling in some basic information about your app. Open the code and look for the following lines:
APP_NAME("Hello World")APP_DESCRIPTION("App that says hello")APP_AUTHOR("You")APP_VERSION("1.0.0")Here, you can customize your app’s name, description, author, and version. This information is optional but helps you keep track of your project and understand what it is doing on the launcher menu.
Step 3: Writing the Main C++ Function
Section titled “Step 3: Writing the Main C++ Function”Now, let’s dive into the heart of your app - the main() function. In C++, every program starts executing from a function called main(). Think of it as the command center of your code. When you run your app, the instructions inside main() are carried out one by one.
extern "C"void main() { /* TODO: Your code goes here ... */}Here’s a simple breakdown:
-
extern "C": This is a technicality that ensures compatibility between C and C++ code. For now, you can consider it a standard part of starting a C++ program. -
void main() { /* ... */ }: This is the beginning of your program. The void here means that the main() function doesn’t return any value.
Inside the curly braces { /* ... */ }, you’ll put the instructions that make up your app. It’s like a recipe; the computer follows these steps when you run your program.
Step 4: The Calculator Environment
Section titled “Step 4: The Calculator Environment”Now, let’s understand two important functions: calcInit() and calcEnd(). These functions manage the calculator environment.
-
calcInit(): This function initializes the calculator environment, preparing it for your app. It’s like turning on the lights and getting everything ready before your program starts. -
calcEnd(): This function restores the calculator to its initial state after your program finishes. It’s like cleaning up and turning off the lights when you’re done.
Place this code inside the backets of the main() function :
    calcInit(); // Initialize the screen
    /* TODO: Your code goes here ... */
    calcEnd(); // Restore the screen to the initial state
These functions ensure your app interacts smoothly with the calculator without leaving any mess behind. Now you’re ready to add your “Hello World” message to the calculator screen!
Step 5: Adding Color with fillScreen()
Section titled “Step 5: Adding Color with fillScreen()”Now, let’s add some color to your app using fillScreen(color(0,0,0)). In simple terms, this function fills the calculator screen with a specified color. The color(0,0,0) corresponds to the RGB values for red, green, and blue, respectively. Here, it’s set to black.
    fillScreen(color(0,0,0)); // Fill the screen with a black color (Red, Green, Blue)
    /* TODO: Your code goes here ... */
Think of it as setting the background of your app. You can change these values to experiment with different colors.
Step 6: Drawing Text on the Screen Buffer
Section titled “Step 6: Drawing Text on the Screen Buffer”Now, let’s position your “Hello World” message on the screen using Debug_SetCursorPosition(). The function takes the X and Y coordinates as parameters, where each unit is 12 pixels horizontally (X) and 24 pixels vertically (Y).
Debug_SetCursorPosition(6,2); // Set the position to x=6, y=2 (72px, 48px)Debug_PrintString("Hello World !",0);-
Debug_SetCursorPosition(6,2): This sets the position cursor where your text will be drawn. The coordinates (6, 2) translate to (x=72px, y=12px) on the actual screen as the font size is 6x12. -
Debug_PrintString("Hello World !",0): This draws the text “Hello World !” on the screen buffer, but won’t display it right now.
Here, your message will appear at (72px, 12px) on the screen after the next step. Feel free to adjust the coordinates to place your text where you want.
Step 7: Updating the Screen with LCD_Refresh()
After making changes to the screen buffer, you need to tell the calculator to show those changes. Think of it like taking a snapshot of your changes and making them visible.
LCD_Refresh(); // Update the screen to show the changesThis is the final touch to ensure your “Hello World” message is displayed as intended.
Step 8: Waiting for User Input
Section titled “Step 8: Waiting for User Input”Now, your app would run and disappear quickly. The last part ensures your message stays until the user is ready to exit. It waits for any key to be pressed:
while(true){ uint32_t key1, key2; // First create variables getKey(&key1, &key2); // then read the keys if(testKey(key1, key2, KEY_CLEAR)){ // Use testKey() to test if a specific key is pressed break; }}It creates a loop that keeps running until a key is pressed, making sure your “Hello World” message stays on the screen until the user is ready. Don’t worry if it’s a bit difficult to understand, as the next tutorial will dive into key inputs !
Step 9: Build and install the app
Section titled “Step 9: Build and install the app”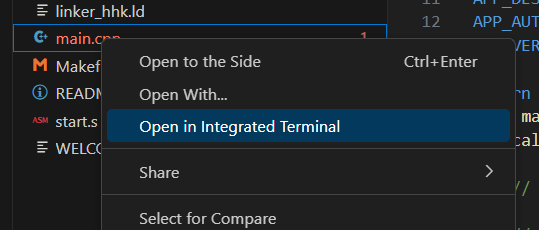
Inside the terminal, enter the following text : make bin
On the file tree, you should see a newly created file named “app_template.bin”. You can right click it and download it to your desktop.
Now, plug your calculator and put this file on the root folder of the calculator (not the Autoimport, the very root folder that opens).
Finally, unplug your calculator and on the menu → System → Hollyhock-2 Launcher search for the “Hello World” app and launch it.
You should see something like this :
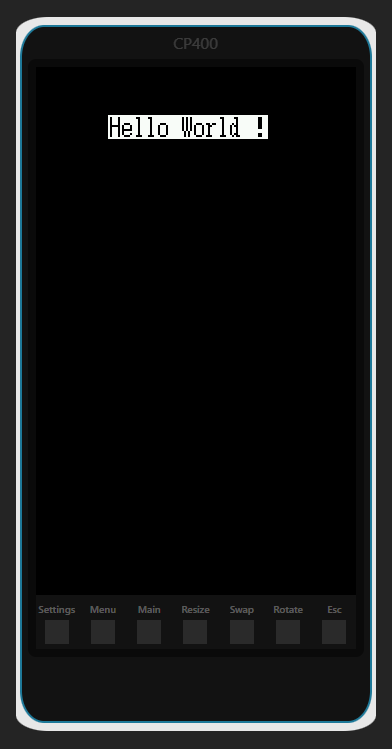
Congratulations! You’ve successfully added color, positioned text, and made your first app interactive. Now, you can run your code and see your “Hello World” message on your Classpad!
Final code
Section titled “Final code”#include <appdef.hpp>#include <sdk/calc/calc.hpp>#include <sdk/os/lcd.hpp>#include <sdk/os/debug.hpp>
/* * Fill this section in with some information about your app. * All fields are optional - so if you don't need one, take it out. */APP_NAME("Hello World")APP_DESCRIPTION("App that says hello")APP_AUTHOR("You")APP_VERSION("1.0.0")
extern "C"void main() { calcInit(); // Initialize the screen
//Example for fillScreen(color); fillScreen(color(0,0,0)); // Red, Green, Blue
Debug_SetCursorPosition(6,2); Debug_PrintString("Hello World !",0);
//use this command to actually update the screen LCD_Refresh();
// Wait for any key to be pressed. Used to not exit right after showing the text. Ingore this for now while(true){ uint32_t key1, key2; // First create variables getKey(&key1, &key2); // then read the keys if(testKey(key1, key2, KEY_CLEAR)){ // Use testKey() to test if a specific key is pressed break; } }
calcEnd(); //restore the screen to initial state}